

The most repeated piece of advice in travel photography is structurally wrong. Not in every context — in most of them. And it sends thousands of photographers to the same overcrowded viewpoints at 6am, shooting identical compositions into identical light, wondering why their results look like a repost.
The advice is: always shoot golden hour. What follows is what that advice gets wrong, and what actually determines whether you come home with usable photographs.
The Golden Hour Rule Has More Exceptions Than It Has Followers
Golden hour — roughly 30 to 60 minutes after sunrise and before sunset — does produce warm, directional light. That part is accurate. What gets omitted from the advice is that golden hour behaves differently depending on latitude, season, and the specific physical geometry of your shooting location.
In Santorini in July, golden hour lasts approximately 20 minutes before the light turns harsh and white. At Banff in October, it stretches past two hours, and the low sun angle transforms the Rockies in ways that midday shooting cannot replicate. These are not minor variations — they’re different photographic situations requiring different planning entirely.
Latitude Changes Everything
At high latitudes — Iceland, Patagonia, northern Scandinavia — the sun travels at a low angle for extended periods. Golden-quality light in Icelandic summer lasts most of the day. At equatorial destinations like Bali, Thailand, or Colombia, harsh overhead light arrives fast. By 9am in Ubud, you’ve often lost your window. These are not comparable situations, and treating them as if they follow the same rule produces predictable failures.
When Overcast Wins
An overcast sky functions as a giant diffusion panel. Waterfalls, dense forests, coastal cliffs, and market scenes frequently photograph better under cloud cover than in direct sun. Contrast is lower, shadows are softer, and colors read more accurately. Most photographers who work seriously in the Scottish Highlands or the Pacific Northwest treat overcast as a preferred condition, not a disappointment. Checking hourly cloud cover forecasts via apps like Windy or Meteoblue typically produces more useful planning data than chasing sunrise times alone.
Urban environments add another variable: in dense city centers like New York or Tokyo, golden hour light is often blocked by buildings before it reaches street level. The blue hour — roughly 15 to 20 minutes after sunset — frequently produces more workable results for city photography, because ambient light and artificial light reach a balance that neither full daylight nor full darkness provides.
Destination Shooting Windows: What the Data Actually Suggests
The table below covers the most commonly photographed destination types and the conditions that generally produce the strongest results. These are patterns, not guarantees — local weather and seasonal variation can shift any of them significantly.
| Destination Type | Best Shooting Window | Worst Time | Key Variable | Example Locations |
|---|---|---|---|---|
| Mediterranean coastline | First 90 min after sunrise | 10am–4pm (harsh overhead) | Sea reflection angle | Santorini, Amalfi, Dubrovnik |
| Mountain wilderness | 30 min post-sunrise, last 60 min pre-sunset | Midday (flat shadows) | Cloud formations | Banff, Dolomites, Patagonia |
| Tropical rainforest | Overcast morning (8–10am) | Clear midday | Humidity and light diffusion | Borneo, Amazon, Bali |
| Urban skyline | Blue hour (15–20 min post-sunset) | Midday (blown-out sky) | City light balance | NYC, Hong Kong, Tokyo |
| Desert landscape | First 60 min after sunrise | 10am–5pm | Sand shadow direction | Sahara, Wadi Rum, Atacama |
| Historic architecture | Early morning weekdays (crowd-free) | Midday tourist peak | Crowd density | Kyoto, Prague, Petra |
| Northern lights | 10pm–2am local time | Any daylight hours | KP index (solar activity) | Iceland, Tromsø, Yukon |
The historic architecture row deserves particular attention. Kyoto’s Fushimi Inari shrine — among the most photographed sites in Japan — can be shot entirely crowd-free by arriving before 6am on weekdays. The same location at 11am on a weekend during cherry blossom season is effectively unphotographable for compositions that suggest solitude or atmosphere. Crowd management is a photographic decision as much as a timing one.
The Gear That Travels Without Costing You Your Back
Here is the honest framing: camera gear matters less than most gear-focused forums suggest, and more than smartphone-only advocates claim. The useful truth sits uncomfortably between both camps.
A full-frame mirrorless body like the Sony A7C II (approximately $2,200 body only) produces measurably superior low-light performance compared to any current smartphone — roughly 2 to 3 stops of dynamic range advantage in challenging scenes. That gap is real, visible in prints above 16×20 inches, and relevant for photographers shooting in high-contrast light. For social media output at 1080p or 4K, that gap largely disappears in most conditions.
The Compact Camera Case
The Fujifilm X100VI ($1,599) is currently the most discussed compact travel camera, and the reasons are defensible rather than hype. Its APS-C 26.1MP sensor, fixed 23mm f/2 lens (35mm equivalent), and in-body image stabilization together produce results that match most zoom mirrorless setups in the 24–35mm range. The constraint — a fixed, non-interchangeable lens — is only a practical problem for photographers who regularly shoot outside the 24–50mm equivalent range. Many don’t.
The weight argument is practical, not abstract. The X100VI weighs 521g with battery and card. A Sony A7C II with a 24-70mm zoom runs roughly 1.2kg. Over a 12-hour shooting day on cobblestones in Lisbon or climbing temple steps in Chiang Mai, that 700g difference becomes a decision you feel in your shoulders by afternoon.
When a Smartphone Is the Right Tool
The iPhone 15 Pro and comparable Android flagships — Samsung Galaxy S25 Ultra, Google Pixel 9 Pro — are the correct choice when: you’re in environments where pulling out a dedicated camera creates a security concern; your subject matter is candid street-level and camera presence changes behavior; your entire output is social media; or weight is the absolute priority on a multi-week backpacking route.
The iPhone 15 Pro’s 48MP main sensor handles most daylight situations credibly. The 3x optical zoom on the Pro Max model (77mm equivalent) produces compressed-background street shots that would otherwise require a dedicated 85mm lens. What it cannot match is extreme dynamic range recovery in post-processing — a bright sky against a dark shadow with detail in both is where the full-frame sensor advantage becomes visible and usable.
Five Composition Mistakes That Ruin Otherwise Good Shots
- Centering every subject by default. A horizon line splitting the frame in half is rarely the strongest compositional choice. Push it to the upper or lower third based on whether the sky or foreground is the actual subject of the image.
- Shooting at standing eye level without considering alternatives. Most travel photos are taken from roughly 160–170cm — standard adult eye height. Drop to knee level in a market. Hold a phone overhead in a dense forest canopy. Shoot through an archway rather than at it. The angle creates the differentiation.
- Ignoring foreground entirely. Wide landscape shots without foreground interest read as screenshots. Wildflowers, rocks, tide pools, a person in the middle distance — anything grounding the viewer creates depth that a background-only composition doesn’t.
- Over-saturating color in post-processing. The teal-and-orange grade of 2015 travel photography reads as dated. Target the actual colors of the location with modest adjustments — typically 10–15% saturation increase in Lightroom, not 40–50%. Overprocessed images age badly.
- Shooting too few frames. Street scenes, wildlife, market movement — photographers who take 3 frames get fewer keepers than those who take 30. Storage is inexpensive. The moment isn’t repeatable. Bracketing for luck is standard practice, not a beginner’s crutch.
Asia, Europe, North America: What Changes Between Regions
Treating travel photography as a single transferable skill regardless of region produces avoidable failures. The technical challenges and creative opportunities shift significantly depending on where you are.
Asia: Density, Light Speed, and the Permission Question
Urban Asia — Tokyo, Seoul, Hong Kong, Ho Chi Minh City — presents scenes with extraordinary visual density. Shibuya Crossing is one of the most photographed intersections on earth, and most images of it look identical because photographers shoot from the pedestrian scramble, at street level, in the same orientation. Less photographed perspectives include the second-floor Starbucks view overlooking the scramble (typically accessible without a purchase in early morning) and the Shibuya Sky observation deck at blue hour.
Tropical Asia introduces a hard deadline. In Thailand, Bali, or Vietnam, direct sunlight by 8:30am is already harsh enough to blow highlights on pale surfaces. The shooting window between first light — roughly 6am — and 8am is not a stylistic preference. It’s the practical difference between images with manageable contrast and frames that require heavy processing to partially salvage. Photographers who arrive at 9am consistently come back with difficult raw files.
Sacred sites across Japan, Thailand, Cambodia, and Bali carry formal or informal photography restrictions, particularly during active religious ceremonies. In most cases, asking permission is both appropriate and practically necessary. Restrictions at sites like Angkor Wat or Kyoto’s restricted temple interiors aren’t uniformly enforced, but the downside risk — card confiscation in some documented cases — is real enough to treat the posted rules as binding.
Europe: The Saturation Problem
European iconic locations — the Eiffel Tower, Oia at sunset in Santorini, the Colosseum from the standard tourist position — have been photographed from every obvious angle by millions of photographers. The images already exist, widely distributed. Getting there at golden hour with a mirrorless camera doesn’t produce a novel photograph; it produces another version of a composition that already exists in identical form across Getty, Unsplash, and Instagram.
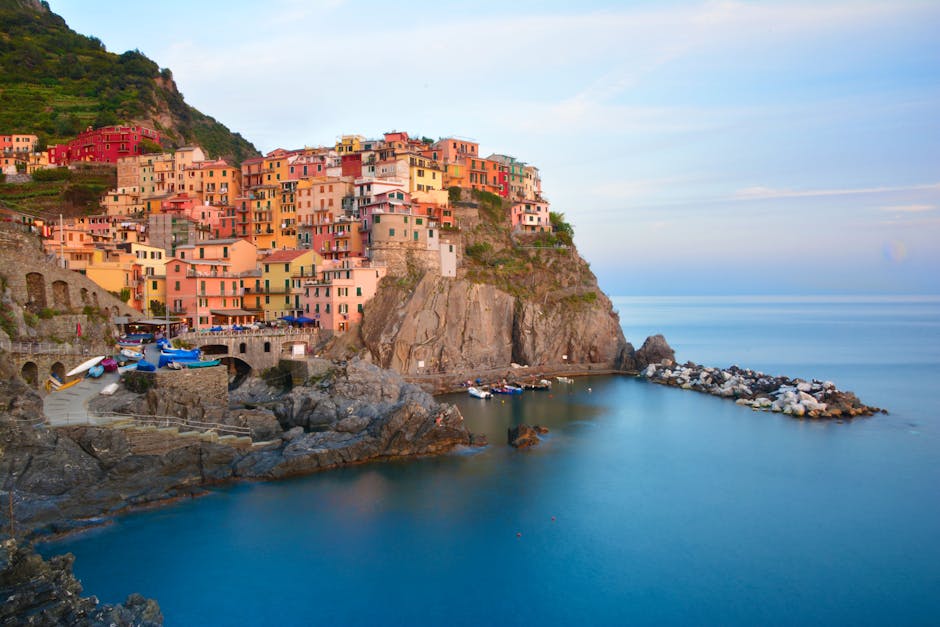
Photographers who produce genuinely differentiated European work typically do one of three things: choose secondary cities over primary icons (Matera rather than the Amalfi Coast, Ghent instead of Bruges); find unusual vantage points of famous subjects (the Colle Oppio park view of the Colosseum rather than the front-facing position every tourist occupies); or make human subjects the primary element, with the landmark as context rather than subject.
Northern European weather is frequently useful rather than problematic. Overcast light over Prague or Edinburgh produces atmospheric images that clear midday sun cannot replicate. Rain creates canal reflections in Amsterdam and wet cobblestone streets in London that are harder to achieve in dry conditions. Treating weather as an obstacle rather than a variable typically produces weaker results.
North America: Scale and the Permit Reality
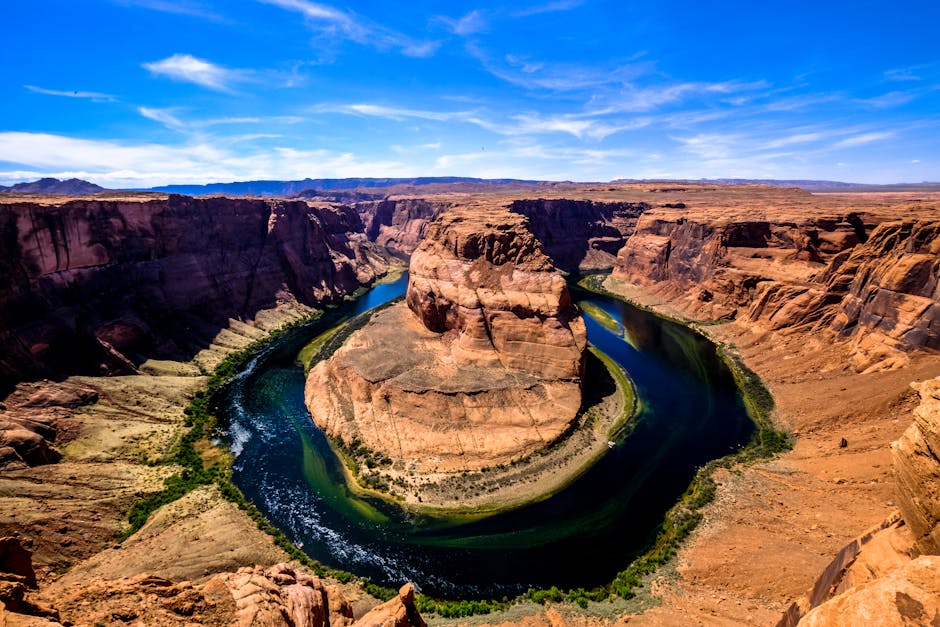
The defining feature of North American landscape photography is physical scale. The American Southwest — Antelope Canyon, the Grand Canyon, Monument Valley, Zion Narrows — presents subjects of a size that makes foreground scale indicators essential rather than optional. A human figure, a vehicle, a tent in the corner of the frame communicates the scale that a pure rock formation cannot convey to a viewer who hasn’t stood there.
Antelope Canyon is the most instructive case in the permit-and-timing system. The light beam phenomenon inside the canyon — shafts of sunlight penetrating the narrow slot overhead — occurs reliably between 10am and 1pm from April through September. Photography tours run by Navajo operators cost $80–120 per person and run longer than standard tours ($30–50), which sometimes schedule visitors outside the light window entirely. Booking a standard tour rather than a photography tour is a mistake that can’t be fixed on the day.
The Wave in Arizona requires a lottery permit ($9 application, 64-visitor daily cap), with winning tickets typically drawn months in advance online. Showing up without a permit means a turned-away visit, full stop. The Maroon Bells in Colorado require a reservation system during peak season. Planning around permit systems in the U.S. National Park landscape is a prerequisite for the visit, not an afterthought.
RAW vs. JPEG: Three Questions That Settle It
Do you edit your photos after shooting?
If not — if you shoot and share directly — JPEG is the better format. RAW files require processing software and deliberate editing decisions. They look flat out of camera compared to the JPEG the camera generates using its own tone curves and sharpening algorithms. A RAW file that goes unedited is objectively worse than a JPEG shot in the same conditions. That’s not an opinion — it’s how the format works.
Are you shooting in high-contrast or low-light conditions?
If yes — if your scene contains both bright sky and deep shadow, or if you’re shooting at ISO 3200 or above — RAW preserves 2 to 3 stops of additional recovery latitude in post-processing. In Adobe Lightroom or Capture One, a blown highlight in a RAW file can often be recovered significantly. The same blown highlight in a JPEG is gone. For landscape photographers dealing with the dynamic range challenges of mountain or coastal shooting, this latitude is the practical argument for shooting RAW.
What are your storage and workflow constraints?
A Sony A7C II RAW file runs roughly 25–40MB per frame. A 256GB card holds approximately 6,000–7,000 RAW files — adequate for most trips. The equivalent JPEG card holds upward of 25,000 images. For photographers on extended trips without regular card offloading, or shooting high-volume street work, this is a logistical consideration worth calculating before departure rather than during it.
The Destinations That Consistently Disappoint — and the Pattern Behind Them
The Maldives. Positano. Bora Bora. These appear on every curated list of the world’s most photogenic destinations. The photography they produce is also, almost universally, the same: overwater bungalow from directly above, turquoise lagoon from the shoreline, pastel houses stacked on a cliff.
That observation isn’t a criticism of the places. It’s a structural point about what happens when a destination’s entire photographic identity consolidates around two or three compositions: the photography community exhausts the novelty quickly. The images already exist at scale, and any new version competes in an entirely saturated visual space.
Destinations that tend to produce stronger, more differentiated work are typically those without an established visual grammar — where the “correct” compositions haven’t been codified yet and widely distributed. Tbilisi, Georgia. The Faroe Islands before roughly 2019. Luang Prabang, Laos. Parts of northern Albania. These reward photographers precisely because the template hasn’t been set.
The useful signal: when a destination begins appearing consistently on “most photogenic places” lists in major travel publications, the window for genuinely novel photography there is closing. The destination may still be worth visiting for every other reason. The photographic challenge simply shifts from finding the shot to finding a perspective that hasn’t already been published hundreds of thousands of times — which is a harder and more interesting problem.


